GSM-tracker is a device for emergency communication with your elderly relatives and assistance in caring for them. It is equipped with two large buttons, so it is very easy to operate. However, it is not easy to understand its settings through the Canyon Life mobile app on your smartphone with just a short manual. Let's do it step by step and without any extra tricks.
Step One: Unpacking and charging the battery
Opening the box, you will find not only the GSM-tracker itself, but also a unique accessory to it: a charger.
ATTENTION! The GSM-tracker can only be charged with this charger. No other device can be used, because this will cause the GSM-tracker to break.At the factory, the GSM-tracker is charged, but while it was waiting for you in the store's warehouse, its battery discharged almost completely. If you see that the red light between the buttons flashes every 5 seconds, it means that the battery charge is less than 20%. So it's better to recharge it immediately. To do this, take the charger and place its magnetic contacts on the pad on the back of the GSM-tracker. The charger is designed in such a way that you can not confuse the polarity: the pad pushes the wrong contacts away and attracts the right ones. It may take 1-2 hours to fully charge the GSM-tracker, depending on how low the battery is. During charging, the red light flashes every second. As soon as the battery is fully charged, the green light will light up.


Step Two: Install the Canyon Life mobile app
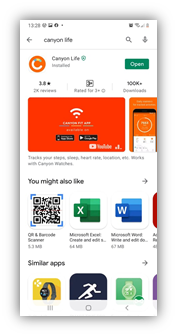
After the GSM-tracker is charged, you can start connecting it to your smartphone. To do this, first install the
Canyon Life app on your Smartphone. It can be downloaded either on
Google Play or on the
App Store. On the app page, click
Install and wait for the app to install. Then click on the
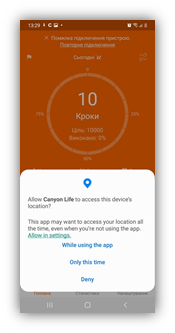
Open button. If you have turned off the
Bluetooth function, you will have to turn it on, because the Smart Watch communicates with your Smartphone via Bluetooth. So, choose the answer option "Yes". Then allow the app to detect your location so that the Smart Watch can inform you about the weather forecast in your city. This information will only be stored inside your Smartphone, and no one will be able to access it. Select the answer option "OK". The following setting confirms that you agree to share your device’s location data with your
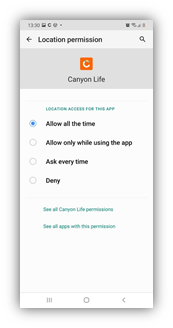
Canyon Life app. Select the "Allow in settings" option. Go to settings and select
Allow in any mode.

Step Three: Insert the SIM card into the GSM-tracker
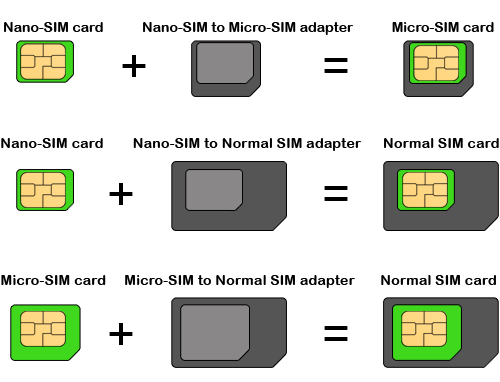
There is no screen on the-tracker, and you will not be able to enter the PIN-code of your SIM-card on it. So you will have to disable the PIN request beforehand. To do this, insert the SIM card into your smartphone. Please note that the GSM-tracker accepts a micro-SIM card, and most modern smartphones accept a nano-SIM card. Both of these sizes are offered in the SIM starter kit: you just have to remove the nano-SIM card from the frame of the micro-SIM card, and after removing the PIN request, insert it back into the frame.
To delete the PIN-code request, go to the
Settings of your smartphone. Open it there
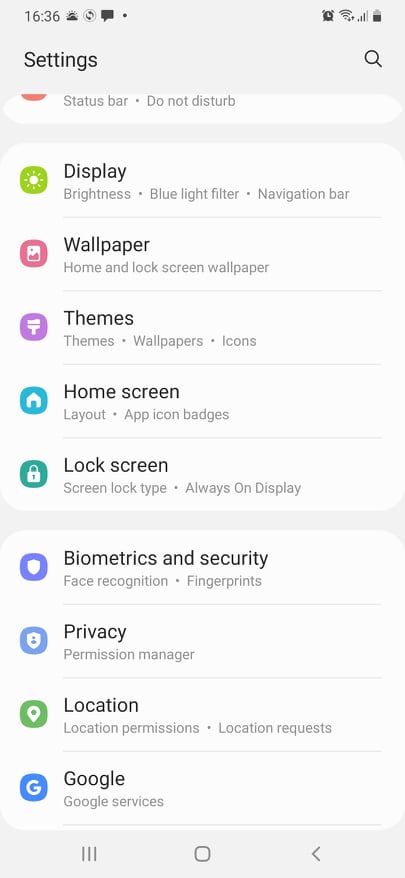
the
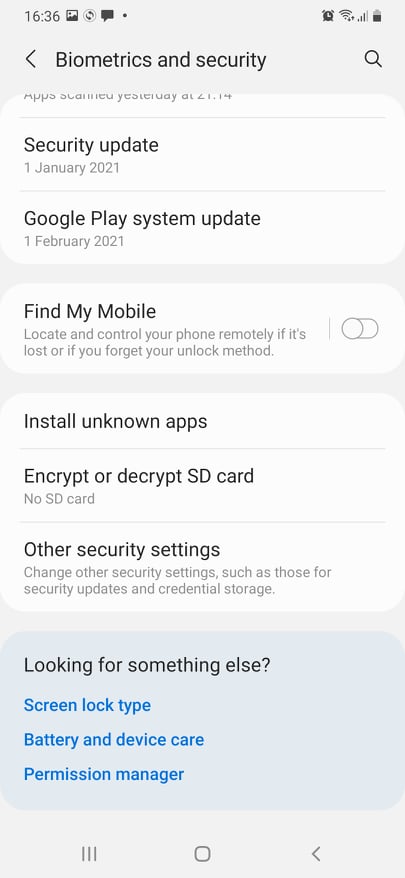
Biometrics and Security tab ->
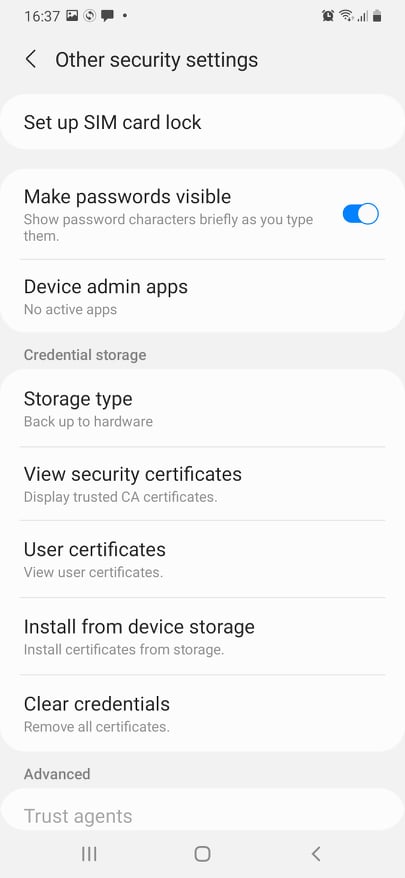
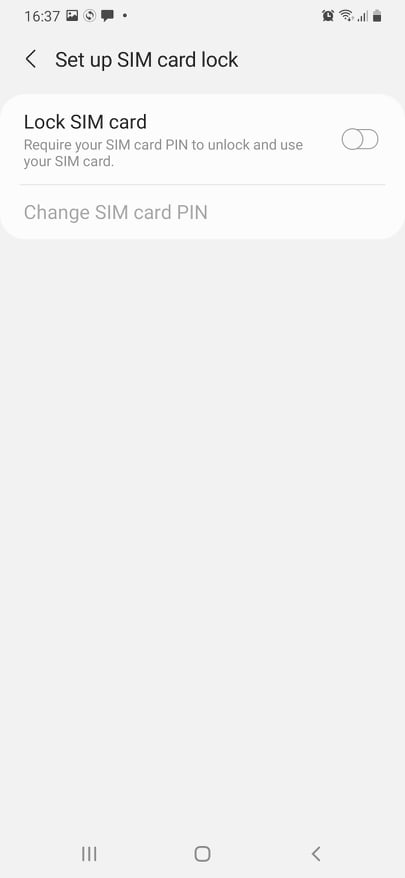
Other security settings -> Set up SIM Card Lock. And there turn off the
Lock SIM Card switch. Please note, that the sequence of actions to disable the PIN request may differ in different smartphone models, but in general it is the same.
After that, turn off your smartphone, remove the nano-SIM card from it and insert it back into the frame of the micro-SIM card.
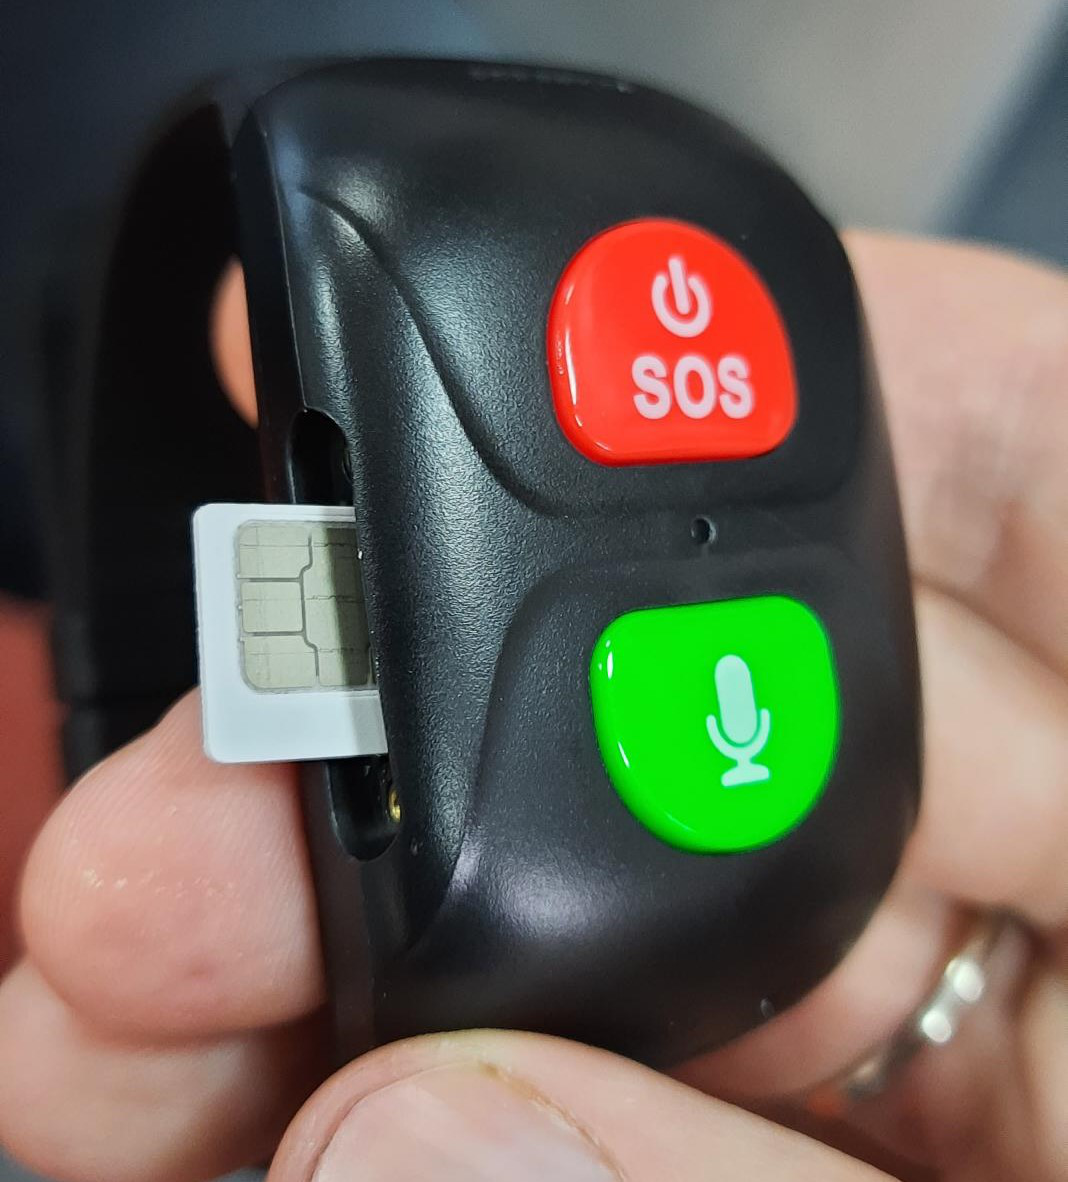
Turn off your GSM-tracker by pressing and holding the red SOS button for more than 5 seconds. Then, using the screwdriver that is included in the kit (you will find it in the box), unscrew the two screws on the side cover of the GSM tracker. Open the cover and insert the micro-SIM card into the GSM tracker as shown in the photo. The SIM-card must fully and deeply enter the case of the tracker so that it does not stick out of the hole. When installing the card, you can gently push it with a screwdriver or tweezers. Then close the case with the lid and tighten the screws.
Step Four: Register your account
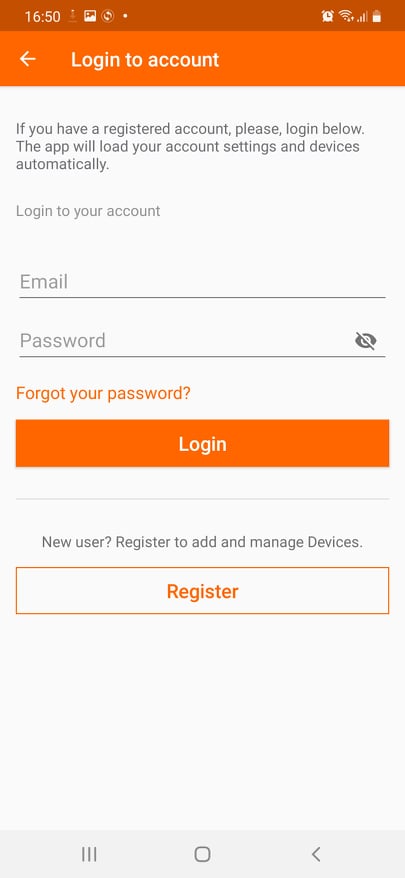
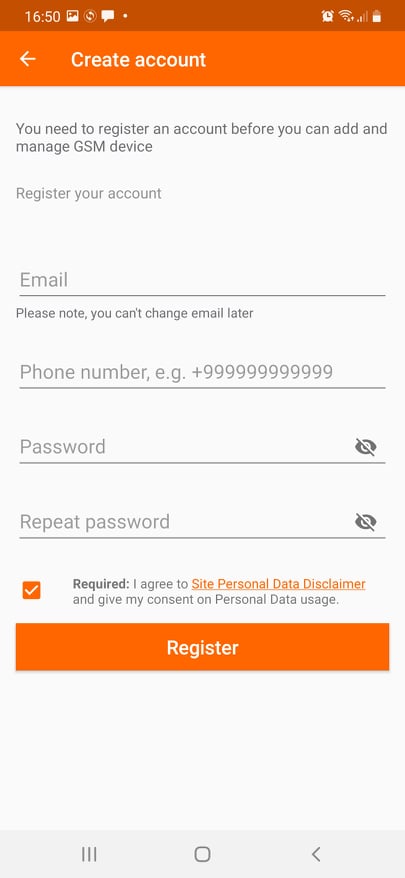
To use the GSM-tracker with the
Canyon Life app, you need to register on the app server. To do this, in the
Setup tab, select the
Other screen and click on the envelope icon or the word
Login. Next, click on the
Register button and on the next screen, enter your email address, your phone number (of a smartphone, not of a GSM-tracker), enter and confirm the password you have created. Confirm your consent to the usage of your personal data and click on the
Register button. Remember your password: you will have to enter it from time to time.

Step Five: Detect the GSM-tracker in the Canyon Life app
Turn on your GSM-tracker by pressing and holding the red SOS button for longer than 5 seconds. Open the
Canyon Life app and select the
GSM Devices screen in the
Setup tab. Click on a line to
Add GSM device. Then check all the items from the
Prepare Device list, namely:The GSM-tracker is fully charged and is not in the box.There is a positive balance on the SIM card of your phone and GSM-tracker (the money in the account has not run out).You have enabled data transmission in your smartphone (switch Mobile Data – Mobile Internet) and disabled the PIN code request on the SIM card of the GSM-tracker, as discussed in the previous chapter.The GSM-tracker is on.Check all the items in the Prepare Device list and enter the registration code attached to the GSM-tracker strap. There are two ways to do this:

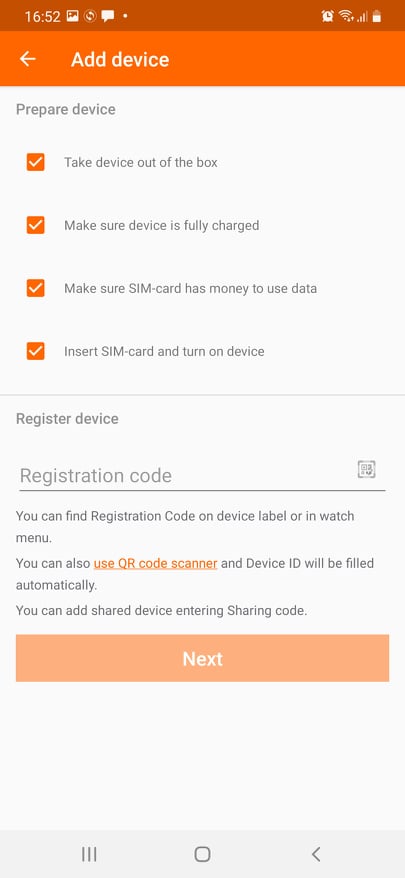
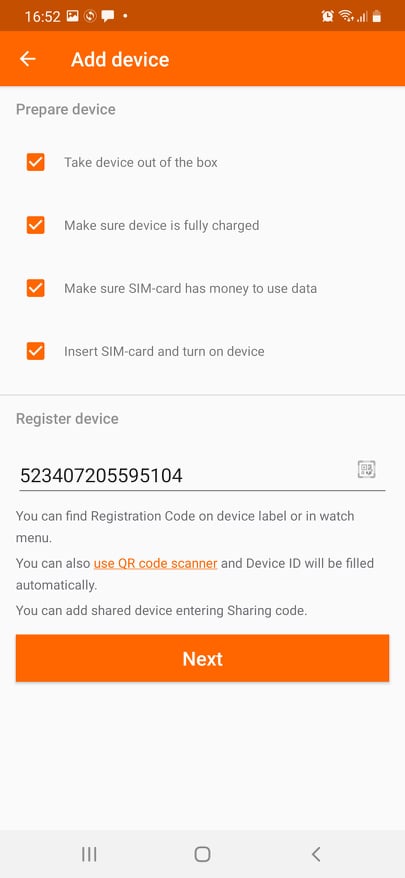
Just enter the code from the tag on the GSM-tracker strap in the
Registration Code line.
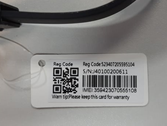
Please note: the registration code is written on the tag immediately after the words
Reg. Code: All other sets of digits and codes (
S/N, IMEI) are not a registration code.Click on the little gray QR-code symbol on the right side of the
Registration Code line (on the screen “Add device”). This will launch the QR-code scanner. Point the scanner at the QR-code on the GSM-tracker tag (under the words
Reg. Code) so that the code square is in the center of the scanner square. It is
not necessary to bring the smartphone closer to the QR-code so that it occupies the entire field of the scanner square.After the registration code is entered in the
Registration Code line, click on the
Next button. If you did everything correctly, you will soon see the message Device connected successfully. Confirm the current location of the device and start setting up your GSM tracker.


However, sometimes it happens that the application does not detect the GSM-tracker. This can be fixed like this:Charge the GSM-tracker.Check whether the PIN-code request is disabled on the GSM-tracker SIM-card, as showed in the previous chapter.Make sure that you entered the registration code correctly.Turn off and turn on the GSM-tracker. Go back to the
GSM Devices tab, click
Add GSM device, and do all the steps again.Perhaps your SIM-card is not able to work with a GSM-tracker at all, because it is of a special type (for example, there is no 2G mode) or it is defective. You can check it like this:
- Insert the SIM-card you use in the GSM-tracker into your smartphone;
- Disable the PIN-code request in the SIM-card settings;
- Disable the Wi-Fi connection in your smartphone;
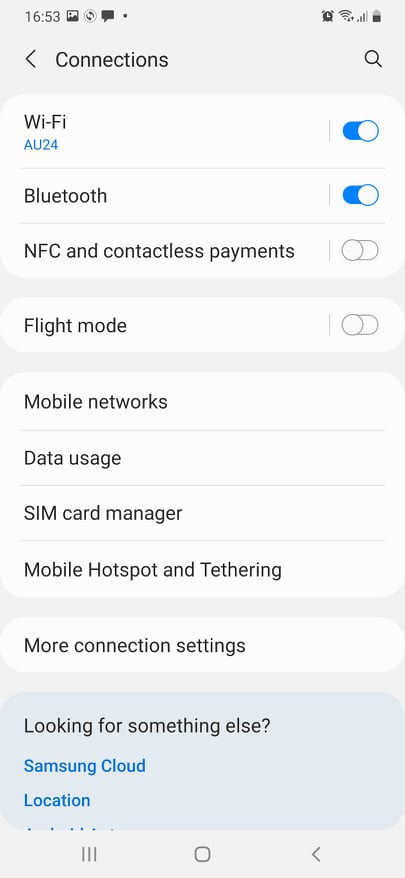
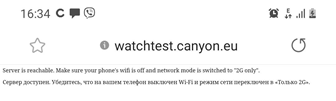
- In the Settings of your smartphone select the network mode 2G only: Settings -> Connections -> Mobile Networks: 2G only.

● Open the Internet browser of your smartphone and click on the link http://watchtest.canyon.eu/, this may take some time. If you see the text
Server is reachable. - Your SIM card is fine. If you do not see this text, then you need to purchase another SIM-card.
Step Six: Setting up the Canyon Life app and GSM-tracker
To access the settings, you need to go to the
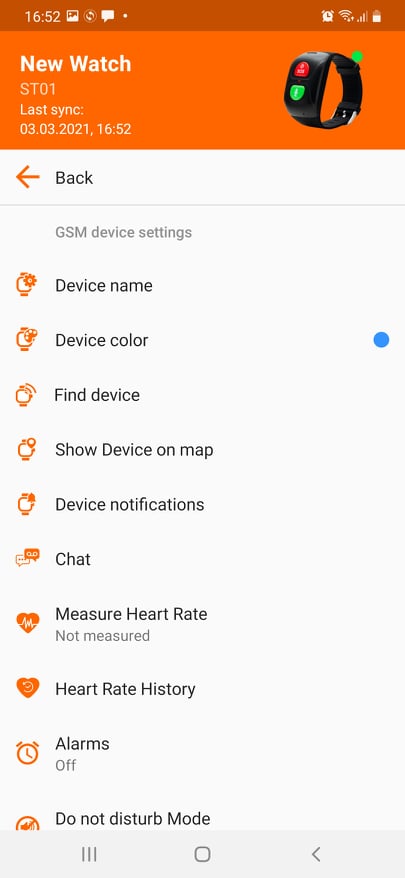
Settings tab, select the screen of the GSM devices, and there find and click the name of your tracker (for example – ST01). Immediately after that, you will be taken to the tracker settings screen. There you can change the following properties:
Device name: for example, you can enter the name of your relative there. You can also change the
Device Color: this will change the color of the marker on the map when you search for the GSM-tracker in
Show Device on map tab.Command
Find device starts the audio signal of the GSM-band. Command to
Show Device on map starts the interactive map with a lot of settings: you can see the location of the GSM-tracker, can make
Forced positioning when the tracker will send every 15 seconds signals of the GSM-tracker location on the map, you also can see the history of movements of the GSM-tracker for any chosen period, to listen to the audio message from the owner of the GSM-tracker, and even customize the border of
Safety Zone: getting beyond these boundaries GSM tracker will send a message.The
Device notifications command starts a list of notifications that came from the device: for example, about a low battery or going outside the
Safety Zone.The
Chat command starts a list of audio messages sent from the GSM-tracker.The
Measure Heart Rate command starts the remote heart rate measurement mode. In the
Heart Rate History tab, you can view how the heart rate of the owner of the GSM-tracker has changed over a certain period of time.The
Alarms tab starts the alarm settings of the tracker.
The Do not disturb Mode allows you to disable all signals from the GSM-tracker.
Heart rate measure settings allow you to measure the owner of the GSM-tracker’s heart rate regularly on a schedule and send a message to your smartphone if the owner’s heart rate is too slow or too fast.The
SOS phones & SMS settings tab allows you to configure the mode of operation of the red button of the tracker. You can record the Main Phone to which SMS notifications will be sent from the GSM-tracker, as well as set up sending SMS messages to this number when the battery of the tracker is low or if a SOS signal was sent from the GSM-tracker. In addition, you can set up three additional SOS Phone numbers to receive signals and messages.The
Silent Callback command allows you to start a call from a GSM-tracker to a smartphone without the knowledge of the owner of the GSM-tracker: for example, if he can not dial your number himself, even with a button. In addition, the GSM-tracker will not make any sounds, so its owner will not know that a call is being made. This feature is also called
Voice Monitoring. The
Callback from GSM device command has a similar function. It differs in that it allows you to choose any number for a call from the GSM-tracker and, of course, the owner of the tracker will hear the connection signal and your voice.The
Geolocation Settings tab allows you to set the frequency of sending the coordinates of the GSM-tracker – from every 1 minute to every 1 hour, or stop tracking the location of the GSM-tracker.
Alarm mode adjusts the sound or silent mode of the device during incoming calls and notifications.You can add up to 10 contacts to your
Phone Book.The
Current time announcement switcher enables the mode where, when the red SOS button on the GSM-tracker is briefly pressed, the owner will hear the exact time message in English or in Russian, depending on the settings.The
Enable steps count on device switcher lets you know how many steps the GSM-tracker owner takes in a day.The
Time, Language tab allows you to set up the language in which the app will be displayed and messages about the exact time in the tracker will sound. In addition, you can set the time zone and automatically switch to daylight saving time.The
Reboot Device command reboots the GSM-tracker. And the
Remote shutdown command turns it off without the participation of the owner of the GSM-tracker.The
Share device command generates a numeric and QR-code valid for 5 minutes, which allows you to connect to the GSM-tracker another smartphone (the Canyon Life app must be installed).The
Device SMS password command allows you to generate an SMS password for remote control of the-tracker.The
Remove Device command removes the GSM-tracker from the list of available devices in the Canyon Life app.
Step Seven: Manage your GSM-tracker
The operation of the GSM-tracker is very simple, as it has only two buttons. Let's look at their operation in the table. Please note that the duration of pressing the buttons is approximate, and it can be mastered after several training sessions.
Red SOS Button| Red SOS Button |
| Number of clicks | Duration of clicks | Result |
| 1 click | Longer than 5 seconds | The GSM-tracker turns on or off |
| 1 click | Shorter than 1 second | The exact time message |
| 1 press immediately after installing the SIM card | Shorter than 1 second | The green light under the SOS button indicates that the tracker is connected to the network. Red indicates that the tracker is not connected to the network. |
| 1 click | From 1 to 3 seconds | Dialing one of the SOS pones numbers in the list (if they are recorded in the Canyon Life app) |
| 1 tap during a call | From 1 to 3 seconds | Disconnecting the connection to the SOS phone numbers |
| 3 short taps in a row | From 1 to 3 seconds all together | Start heart rate measurement. |
| Green button |
| 1 click | Shorter than 1 second | Listen to audio messages |
| 1 click | You can choose the duration of the click yourself | As long as the green button is pressed, you can record a voice message. Start talking 3-4 seconds after pressing the green button. As soon as you release the green button, your voice message will be sent to your smartphone. You can listen to it in the Chat list. |
| 1 tap during a call from your smartphone | Shorter than 1 second | You can answer the call from your smartphone. |
| 3 short taps in a row | From 1 to 3 seconds all together | Dial a number from the SOS phones list. |
Also, pay attention to the flashing light indicator.
| Red signal |
| Behaviour | Meaning |
| Blinks every 5 seconds | Battery charge less than 20% |
| Flashes once every second while charging | The tracker's battery is being charged |
| Green signal |
| Lights up constantly during charging | The battery is fully charged |
| Lights up for 3 seconds after pulse measurement | Pulse measurement was successful |
Step Eight: Important note
Please note that the correct measurement of heart rate and other parameters is possible only if the GSM-tracker will always be on the hand of its owner.